WinContig | Documentation
Installation of WinContig
WinContig is a standalone executable that doesn't require installation or additional DLLs.
To start using it, simply extract the contents of the distribution ZIP archive (WContig.zip file) to
a folder of your choice and run the program.
Note
It's important that you keep the structure of the folders during the extraction process.
Upon the extraction of the ZIP archive, the tree folder structure should be similar to the following picture. Notice the Lang and ShellExt subfolders.

The distribution ZIP archive includes both 32-bit and 64-bit editions of WinContig.
Installation of the shell extension of WinContig
The shell extension of WinContig enables you to analyze and defragment files and folders by right-clicking on them in File Explorer and selecting the required option from the context menu.
Note
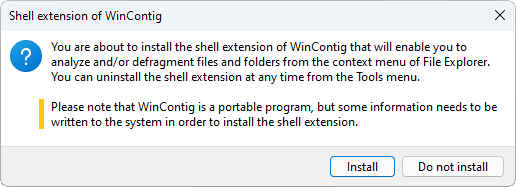
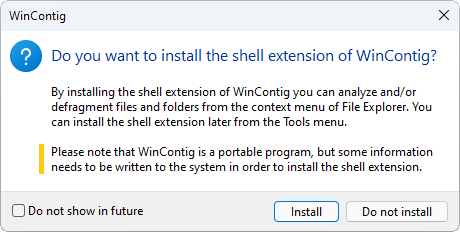
WinContig is a portable program, but some information needs to be written to the system in order to install the shell extension.
At the first run, WinContig will prompt you to install the shell extension.
Select Install to install the shell extension of WinContig or select Do not install to not install the shell extension of WinContig and close the prompt.If you don't install the shell extension of WinContig, the prompt will be displayed at the next run of the program. To disable the prompt, check the Do not show in future option, and then click on the Do not install button.
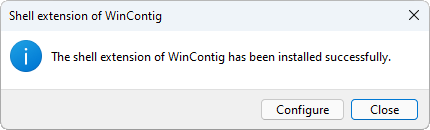
Once the shell extension has been installed successfully, you can immediately configure it by clicking on the Configure button. Otherwise, click on the Close button to close the message dialog.
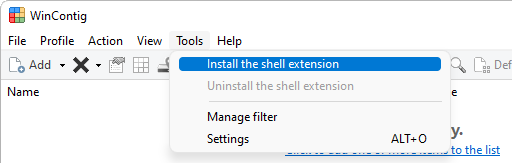
If you prefer to install the shell extension of WinContig at a later time, follow these steps:
- Run WinContig.
- Select Tools → Install the shell extension.
- WinContig will prompt you to install the shell extension.
Select Install to install the shell extension of WinContig or select Do not install to not install the shell extension of WinContig and close the prompt. - Once the shell extension has been installed successfully, you can immediately configure it by clicking on the Configure button. Otherwise, click on the Close button to close the message dialog.