 WinContig | Documentation
Basic usage
Before beginning to use any function or tool of WinContig, you may want to get familiar with the user interface of WinContig. This helps in the navigation of the application.
The default settings of WinContig allow you to analyze and defragment files and folders with just a click of a button. However, there are also several customization options available to suit your needs.
Analyzing items
Before defragmenting the items, you can analyze them to get an overview of how they are fragmented on the disk.
To perform the analysis of the items, follow these steps:
- Run WinContig.
- Add the files and folders that you want to analyze to the items list by selecting File → Add item or by opening a profile.
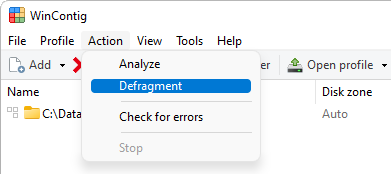
- Select Action → Analyze to start analyzing all listed items.
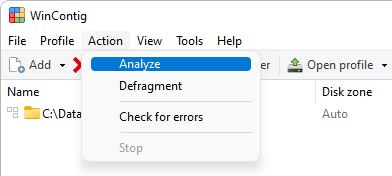
If you would prefer to analyse only some items and not all of them at once, select the items that you want to process, click the right mouse button on one of the selected items and choose Analyze selected items from the shortcut menu. - Depending on the amount of the items, the analysis may take some time. During the analyzing process, WinContig displays a progress bar to provide feedback about the progression of the analysis. If you want to stop the analyzing process, select Action → Stop.
- Once the analysis is complete, select the Fragmented items tab to view the fragmented items found during the analyzing process. The items that were not processed due to an error are listed in the Errors tab.
- You can save the analysis results in a text document by selecting File → Save analysis report.
For more detailed information about the fragmentation of an item, select it in the items list or in the Fragmented items tab, and then select File → Fragment information. WinContig will display the Fragments dialog.
Analyzing disks
Before defragmenting the items, it is highly recommended that you check the integrity of the data stored on your disks to ensure that no data will get corrupted during the processing of the items. To check the file system of a volume for logical and physical errors, select Action → Check for errors. WinContig will display the Check disk dialog.
Defragmenting items
Note
SSD devices operate differently than HDDs and see no performance benefit from traditional HDD defragmentation. SSDs have no moving parts, so they are not affected by the physical limitations of mechanical hard drives. File defragmentation causes lots of write processes and can put undue wear on specific areas of the drives. It is recommended that you do not defragment files on Solid State Drives.
- Run WinContig.
- Add the files and folders that you want to defragment to the items list by selecting File → Add item or by opening a profile.
- If you need to process only specific items, select Tools → Manage filter.
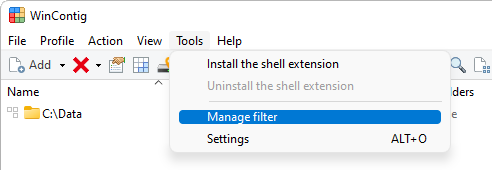
WinContig will display the Filter dialog, which allows you to specify which items to process and which items to skip. - Before starting the defragmentation process, you may want to place some items that you access the most in the fastest
zone of the hard drive, and move some other items (for example, the least accessed files) to the slowest zone of
the hard drive.
To do this, select the items that you want to move, and then click on the Disk zone button on the
toolbar.
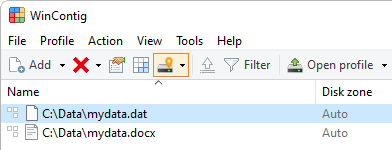
WinContig will display the Disk zone dialog that enables you to specify into which zone of the disk the selected items should be placed.
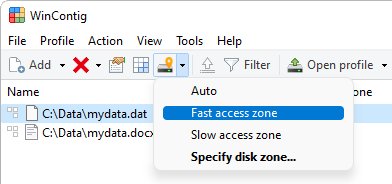
Click the arrow to open a menu so that you can directly select a disk zone.
- Select Action → Defragment to start defragmenting all listed items.
If you would prefer to defragment only some items and not all of them at once, select the items that you want to process, click the right mouse button on one of the selected items, and choose Defragment selected items from the shortcut menu. - By default, before performing the defragmentation process, WinContig will automatically check the integrity of the data stored on the disk (see Check disk dialog) and then will free up drive space by deleting the temporary files (see Disk clean-up dialog). You can customize this behavior in the settings of WinContig.
- Depending on the amount of the items and their level of fragmentation, the defragmentation may take some time.
During the defragmentation process, WinContig displays a progress bar to provide feedback about the progression of the
process. If you want to stop the defragmentation process, select
Action → Stop.
Note
If the defragmentation engine is in the middle of a move request, it may take some time to stop a defragmentation session, depending on the settings of the program.
- Once the defragmentation is complete, select the Errors tab to view the items, if any, that were not processed due to an error.