 WinContig | Documentation
Check disk dialog
In this dialog you can check the file system of a volume for logical and physical errors. WinContig scans a volume by using the Windows' built-in check disk function. To display the Check disk dialog, select Action → Check for errors.
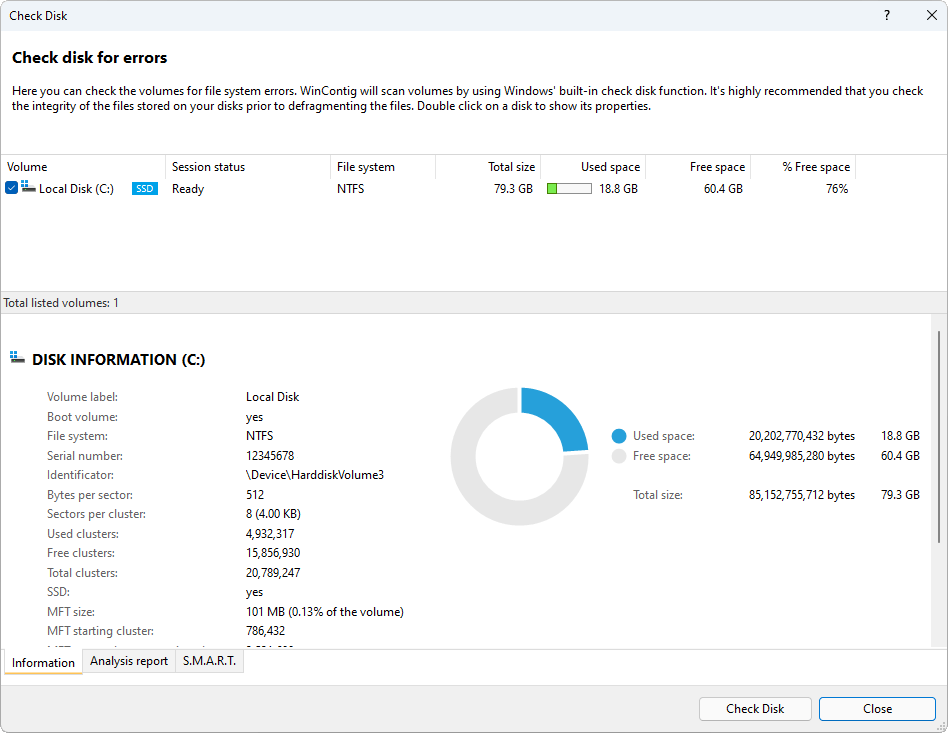
The list at the top of the dialog shows the volumes on which the items to be processed are recorded. You can double click on a volume to show its properties. The size of the list can be adjusted by dragging the splitter at the bottom edge of the status bar, which is located at the bottom of the list.
Checking the file system of a volume for errors
Note
It's highly recommended that you check the integrity of the files stored on your disks prior to defragmenting the files.
To check a volume for errors, perform the following steps:
- In the volume list, select the volume that you want to check for errors. You can select more than one volume.
- Click on the Check Disk button. Once the process has completed, the results of the scan will be displayed in the Analysis report tab. If you want to run the check of a volume in a regular command prompt window, press and hold the SHIFT key while clicking on the Check Disk button.
Two further options are available when this dialog is displayed during the defragmentation process:
| Option | Description |
|---|---|
| Start automatically the defragmentation process if no problems are found | If this option is selected and no problems are found during the checking of a volume, WinContig automatically closes this dialog and starts the defragmentation process. If this option is not selected and no problems are found during the checking of a volume, you may click on the Don't Check Disk button to close this dialog and continue with the defragmentation process or click on the Cancel button to close this dialog and cancel the defragmentation process. |
| In the future, do not check the volumes | If this option is selected, WinContig will not display this dialog anymore prior to starting the defragmentation process. You can enable or disable the display of this dialog in the settings of WinContig. |
Descriptions of the columns in the volume list
The volume list has the following columns:
| Column | Description |
|---|---|
| Volume | Displays the label of the volume. If the volume has no label, the displayed name is the default volume label
(for example, Local Disk).
The checkbox next to the volume icon allows you to select the volume that you want to check for file system errors. The |
| Session status | Displays the progress status while the check for file system errors is being executed. |
| File system | Displays the file system of the volume. |
| Total size | Displays the capacity of the volume. |
| Used space | Displays the amount of used space on the volume. |
| Free space | Displays the amount of free space on the volume. |
| % Free space | Displays the amount of free space on the volume, in percentage. |
Information tab
This tab shows detailed information about a volume. Click on a volume to display the relevant information. To copy the contents of this tab to the Clipboard, scroll down to the lower part of the page and click on the Copy to the Clipboard button.
Analysis report tab
This tab shows the results of the check disk operation. Double-click anywhere on the report to copy the results to the Clipboard.
S.M.A.R.T. tab
This tab shows the S.M.A.R.T. (Self-Monitoring, Analysis, and Reporting Technology) attributes of a drive, such as the drive temperature or how many hours the drive has been powered on. By default, the drive temperature is displayed in Celsius. You can toggle the temperature between Celsius and Fahrenheit by clicking on the temperature value. Alternatively, you can select the temperature scale in the settings of WinContig.